¶ Configuring SSH Keys
SSH access to COSMOS domains requires the use of public key authentication. If you try to connect using the username and password that you use for accessing the scheduler and status pages, you will receive the following message:
not_a_user@laptop:~$ ssh not_a_user@bed.cosmos-lab.org
not_a_user@bed.cosmos-lab.org: Permission denied (publickey).
You need to configure the SSH client on your computer to use a private key for connecting to COSMOS machines instead of a password.
Additionally, the corresponding public key needs to be added to your COSMOS account.
This page describes the procedure for:
-
generating a public/private key pair
-
configuring your SSH client to use the private key
-
uploading the public key to your COSMOS account.
The instructions here are for specific SSH client software, if you use a different SSH client than those referenced here, please follow the documentation provided with that SSH client and use the instructions here for reference.
If you already have an ssh key that you use (for github, or for accessing school resources), you can skip key generation and to straight to the instructions on uploading your key to the cosmos portal.
Key generation instructions are provided on this page for
¶ Windows Key Generation
NOTE: These instructions are NOT for Ubuntu running on Windows using Windows Subsystem for Linux (WSL).
-
Open a PowerShell terminal.
-
Enter the following command at the prompt:
ssh-keygen -t ed25519
Follow the prompts to generate your SSH key pair. You will be prompted to provide a file name for the new key please leave this blank (press enter without typing anything) to use the default value. For security reasons, we recommend entering a passphrase for your key. It can be anything. Do not forget the passphrase for the key because it cannot be reset.
An example of the output you will see is shown below.
PS C:\Users\local_user> ssh-keygen -t ed25519
Generating public/private ed25519 key pair.
Enter file in which to save the key (C:\Users\local_user/.ssh/id_ed25519):
Enter passphrase (empty for no passphrase):
Enter same passphrase again:
Your identification has been saved in C:\Users\local_user/.ssh/id_ed25519.
Your public key has been saved in C:\Users\local_user/.ssh/id_ed25519.pub.
The key fingerprint is:
SHA256:/sR9z7I0dW40cKcUabv2yv7VAAkLy+snm4tpt9UW6qg local_user@local-pc
The key's randomart image is:
+---[RSA 3072]----+
|        . .   .. |
|       . . o .o. |
|        o . oo.o.|
|         .   o+o.|
|        S   . oo+|
|       S . + .o=+|
|        + * +.+.=|
|      .o.@ . +.=o|
|     .Eo*oo  .==+|
+----[SHA256]-----+
Please proceed to the instructions on uploading your key
¶ MacOS Key Generation
Mac OS has a native command line ssh client that can be used to remotely log into consoles. From the Finder select Applications -> Utilities -> Terminal to open a command line terminal.
Generate the public and private keys using the following command:
ssh-keygen -t ed25519
Follow the prompts to generate your SSH key pair. You will be prompted to provide a file name for the new key please leave this blank (press enter without typing anything) to use the default value. For security reasons, we recommend entering a passphrase for your key. It can be anything. Do not forget the passphrase for the key because it cannot be reset.
An example of the output you will see is shown below.
your_username@Macintosh ~ % ssh-keygen -t ed25519
Generating public/private ed25519 key pair.
Enter file in which to save the key (/Users/your_username/.ssh/id_ed25519):
Created directory '/Users/your_username/.ssh'.
Enter passphrase (empty for no passphrase):
Enter same passphrase again:
Your identification has been saved in /Users/your_username/.ssh/id_ed25519.
Your public key has been saved in /Users/your_username/.ssh/id_ed25519.pub.
The key fingerprint is:
SHA256:sclFUKMVPUAUBEk+Qa3MZhLv3qfo/BWY+B5huCajS5U
The key's randomart image is:
+---[RSA 2048]----+
|       o*X%=     |
|      ...=..o    |
|       ==..  .   |
|      .oBO o     |
|      E=S = .    |
|     .  .+ . .   |
|    . o.o.o .    |
|   . . =.o.o.    |
|    o. .+.+o     |
+----[SHA256]-----+
Please proceed to the instructions on uploading your key
¶ Ubuntu Key Generation
These instructions assume you will be using a standard command-line SSH client for linux. If you have not already done so, ensure that you have it installed by running the following commands in a command-line terminal:
sudo apt-get update
sudo apt-get install openssh-client
Each distribution has their own location for the specific generation tools. These instructions are based on the documentation for Ubuntu (located here).
To create your public and private SSH keys, open a command-line terminal and type:
ssh-keygen -t ed25519
Follow the prompts to generate your SSH key pair. You will be prompted to provide a file name for the new key please leave this blank (press enter without typing anything) to use the default value. For security reasons, we recommend entering a passphrase for your key. It can be anything. Do not forget the passphrase for the key because it cannot be reset.
Generating public/private ed25519 key pair.
Enter file in which to save the key (...):
Enter passphrase (empty for no passphrase):
Enter same passphrase again:
Your identification has been saved in ...
Your public key has been saved in ...
Your public key is now available as .ssh/id_ed25519.pub in your home folder.
This process will generate and store a private key and a public key file. The private key will be stored in the file and location you specify when prompted, and the public key file will be named the same as your private key file but with a .pub extension.
Please proceed to the instructions on uploading your key
¶ Uploading Your Key
-
Go to the portal and sign in with your COSMOS username and password
-
Click on your name in the top-right and then SSH Keys in the menu (or go directly to https://www.cosmos-lab.org/portal/ssh-keys)
-
To retrieve your public key, open up a terminal or powershell on your machine, and enter
cat .ssh/id_ed25519.pub
- Copy the output of that command (keep in mind that if you are using linux, you need to hold down the shift key when you are copying and pasting in a terminal) and paste it into the text box under Upload New Key, then click Upload Key.
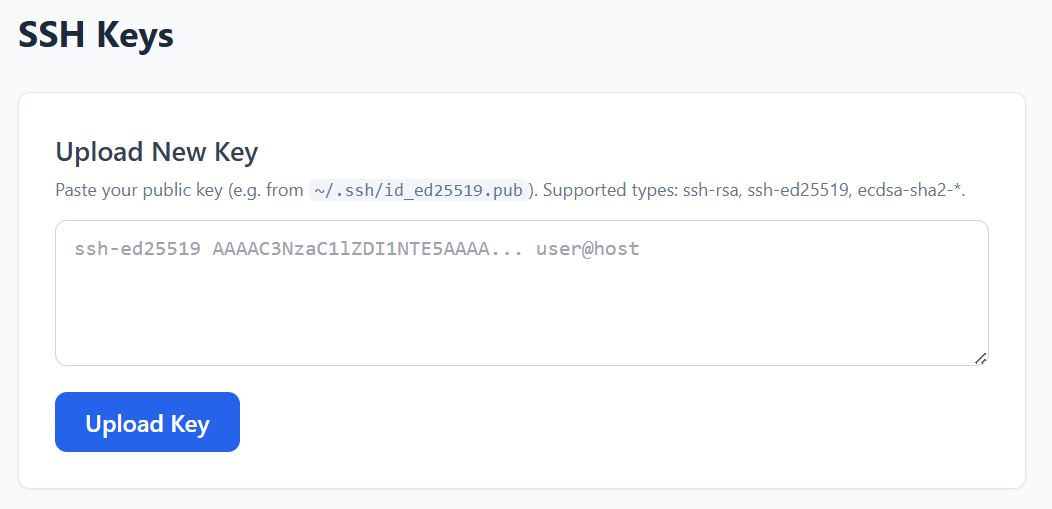
As a side note, expect to see a default auto generated public key in the list (labelled @internal1). This is used for SSH access between machines inside the COSMOS network — between the gateway and the consoles. Please do NOT delete this key; if you already did, see the restore procedure below.
¶ Testing your connection
Under normal circumstances, as long as the private key file is located in the default location, the command line SSH client will use the correct key when connecting.
To test your setup, open a command-line terminal and (replacing your_cosmos_username with your own ORBIT username) type:
ssh your_cosmos_username@gw.cosmos-lab.org
You should be prompted to enter your key file passphrase and be able to successfully connect. You should be greeted with banner text like this:
                              Welcome to
    ___  ____  ____ ___ _____     _        _    ____
   / _ \|  _ \| __ )_ _|_   _|   | |      / \  | __ )  ___  _ __ __ _
  | | | | |_) |  _ \| |  | |_____| |     / _ \ |  _ \ / _ \| '__/ _` |
  | |_| |  _ <| |_) | |  | |_____| |___ / ___ \| |_) | (_) | | | (_| |
   \___/|_| \_\____/___| |_|     |_____/_/   \_\____(_)___/|_|  \__, |
                                                                |___/
Type exit at the command prompt and press the Enter key to end the SSH session.
¶ Troubleshooting
¶ Host authenticity can't be established
If you receive a message like the following:
The authenticity of host 'gw.cosmos-lab.org (128.6.192.134)' can't be established.
ECDSA key fingerprint is SHA256:iLKtq2Z8wB3ADJdEyM1CwoU85gOeqIUyB4GOJ2YloQg.
Are you sure you want to continue connecting (yes/no)?
This is a normal message that occurs when your computer connects via SSH to another that it has never connected to before or if the "fingerprint" of the other machine changed (due to replacement or reconfiguration). Simply type yes and connection will proceed normally.
¶ Permission denied (publickey)
If you receive a message like the following:
Permission denied (publickey).
Try connecting again but manually specifying the location where your private SSH key is stored as in the following example (fill in the path and key file name):
ssh -i /path_to_where_key_is_stored/private_ssh_key_name your_cosmos_username@gw.cosmos-lab.org
If you are using powershell, the key file path will look like this:
ssh -i C:\Users\local_user\.ssh\id_ed25519 your_cosmos_username@gw.cosmos-lab.org
¶ If you deleted the "@internal1" key from your profile
As long as you have at least one public key configured in your profile, use your SSH client to connect to gw.cosmos-lab.org and run the following commands there. You do not need to make a reservation in the scheduler for this.
'''Make sure you are connected to gw.cosmos-lab.org and running all of the following commands on gw.cosmos-lab.org
rm ~/.ssh/id_rsa
rm ~/.ssh/id_rsa.pub
ssh-keygen -t rsa -C "@internal1"
Press 'Enter' at every prompt so that the default filename (id_rsa) and no password is used.
Then type the following command:
cat ~/.ssh/id_rsa.pub >> ~/.ssh/authorized_keys
The internal key should now be restored.